Editing an Asset from the Assets Data Page
Once an asset is added to an item, you may edit it at the Edit Asset form. For more information, refer to the steps that follow.
- Open the Assets Data page by selecting Assets > Assets Data from the navigation pane.
- The Assets Data page appears. The assets are listed in the page's grid.
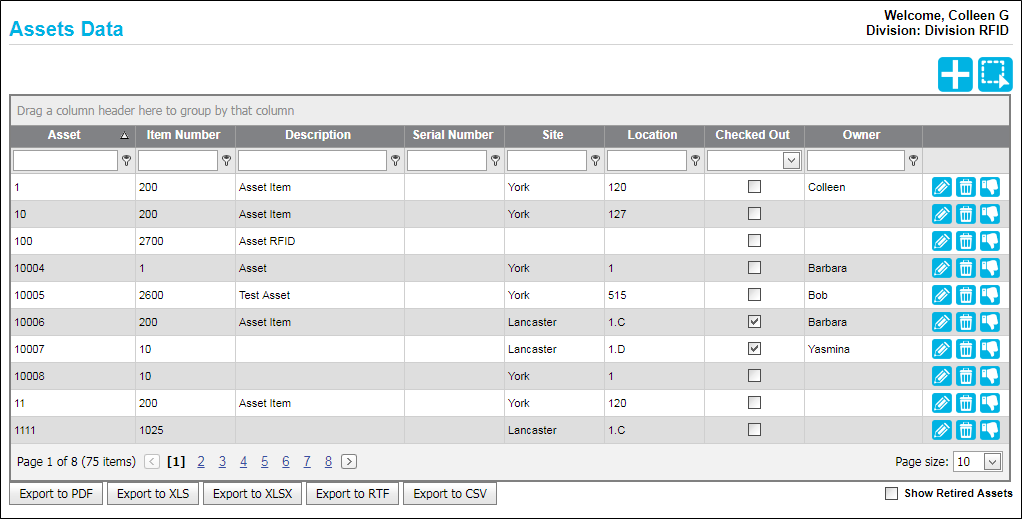
- To edit an asset, locate the asset at the Assets Data page and select the
 Edit icon to the right of the asset. The Edit Asset form for this asset appears.
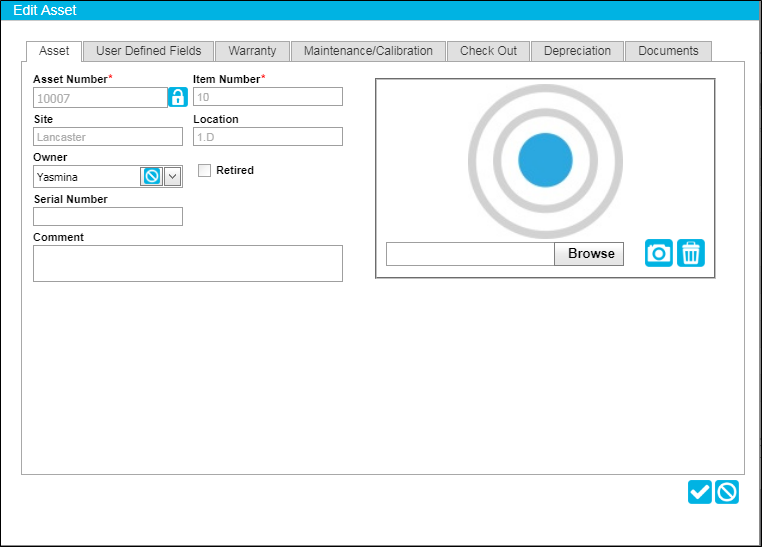
Asset Tab
This tab is automatically to the front. It displays the asset number, serial number for the asset, default location for the asset, comment for the asset, and whether the asset is retired.
- Asset Number: To edit the asset number in this field, click the Unlock icon
 to unlock the field. Now the field is editable and may be changed. (The asset number must be unique to the division.)
 - Item Number: this field may not be changed.
- Site: when the asset is placed in a site, this field may not be edited. If the asset does not contain a default location, a site may be selected when in Edit mode.
- Location: when the asset is placed in a location, this field may not be edited. If the asset does not contain a default location, a location may be selected when in Edit mode.
Note: The asset's site-location may be changed by performing an asset move, or this location may be changed at asset check in.
- Serial Number: the asset serial number may be changed. Edit the serial number in this field.
- RFID Tag Number (if applicable): the asset RFID tag number may be changed. Edit the RFID tag number in this field.
- Owner: the owner may be added, changed, or cleared.
- Comment: the asset's comment may be changed or added.
- Retired checkbox: this field is automatically set by the system and cannot be changed. If the asset is retired, the Retired checkbox is automatically filled in by the system; if the asset is not retired, the Retired checkbox is not marked.
- Asset Picture: the asset picture may be added, edited, or deleted when in Edit mode.
User Defined Fields Tab
Click this tab to bring it to the front and view the user defined field information for the asset.
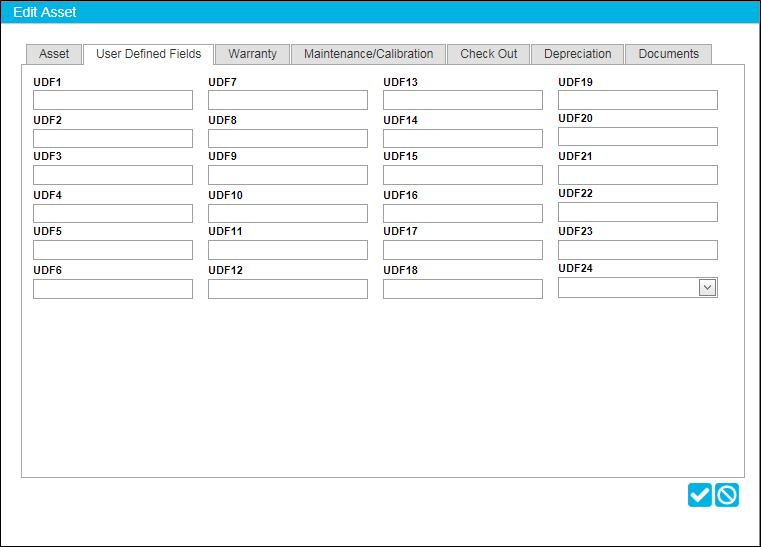
- UDF 1-20: these fields accept alphanumeric data. These fields may be changed in Edit mode.
- UDF 21-23: data in these fields accept numeric data only. These fields may be changed in Edit mode.
- UDF 24: the date in this field may be changed. Click the drop-down arrow in this field and select the date from the calendar control that appears.
Warranty Tab
Click this tab to bring it to the front. The warranty information for the asset is found in this tab.
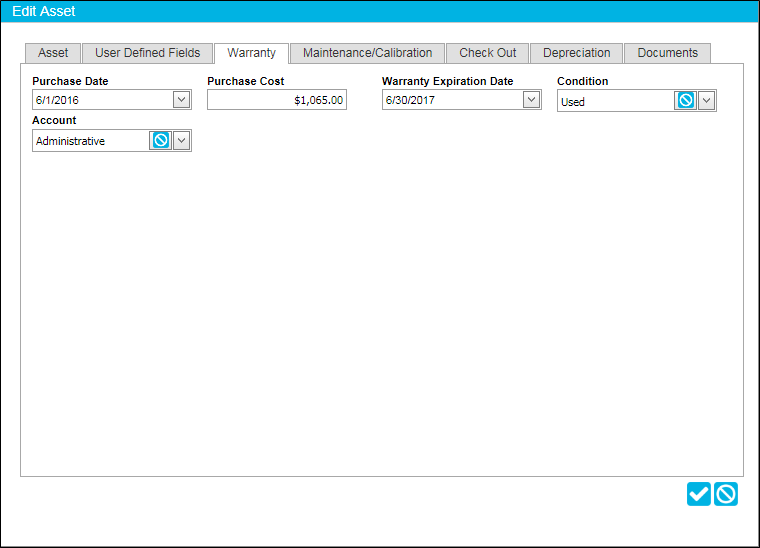
- Purchase Date: to change the Purchase Date, click the drop-down arrow in this field and select a new purchase date from the calendar control that appears.
- Purchase Cost: enter the purchase cost in this field.
- Warranty Expiration Date: click the drop-down arrow in this field and select a new date from the calendar control that appears if you want to change this date.
- Condition: to change the asset condition, click the drop-down arrow in this field and select from the condition lookup list that appears. To clear the Condition, select the
 Clear icon. (Condition lookups are entered at the Manage Lookups page.)
 - Account: to change the account associated with this asset, click the drop-down arrow in the Account field and select the account from the list that appears. To clear an account selection, select the Clear icon.
Maintenance/Calibration Tab
Note: In order to view this tab, the role of the logged-in user must include the Maintenance and Calibration feature.
Click this tab to bring it to the front. This tab contains the maintenance and calibration information for the asset. When you enter a Maintenance Order or a Calibration Order at the Maintenance and Calibration page, the system automatically updates the maintenance and calibration last service date in the Assets form\Maintenance and Calibration tab. If a maintenance or calibration period is entered in this field, the next maintenance date or the next calibration date is also updated.
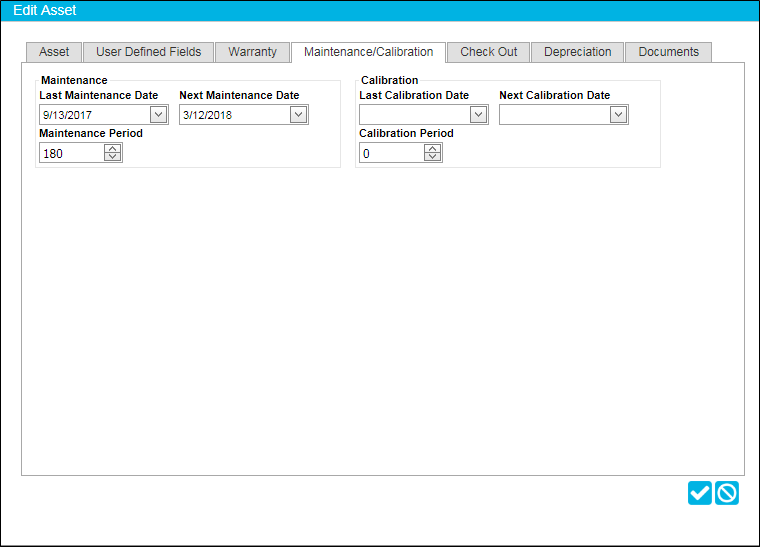
- Last Maintenance Date: this date may be changed. Click the drop-down arrow in this field and select the new date from the calendar control that appears.
- Next Maintenance Date: this date may be changed. Click the drop-down arrow in this field and select the new date from the calendar control that appears.
- Maintenance Period: the maintenance period may be changed. Enter the new maintenance period, in days, in this field. If it is changed, the next time a maintenance order is performed the Last Maintenance Date and Next Maintenance Date will automatically be entered based on the maintenance period that is entered.
- Last Calibration Date: this date may be changed. Click the drop-down arrow in this field and select the new date from the calendar control that appears.
- Next Calibration Date: this date may be changed. Click the drop-down arrow in this field and select the new date from the calendar control that appears.
- Calibration Period: the calibration period may be changed. Enter the new calibration period, in days, in this field. If it is changed, the next time a calibration order is performed on this asset, the Last Calibration Date and the Next Calibration Date will automatically be entered based on the calibration period that is entered.
Check Out Tab
Note: In order to reach this tab, the role of the logged-in user must include the Check In or the Check Out feature.
The information in the Check Out tab is displayed by the system. It cannot be added or edited.
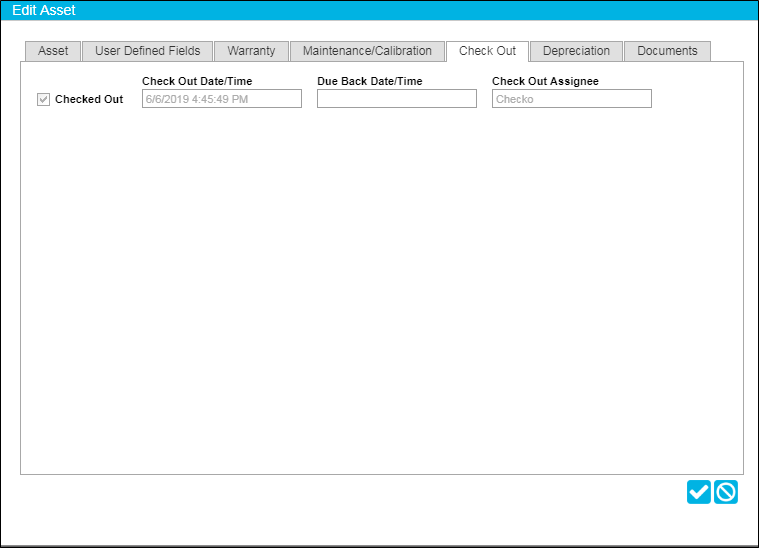
- Checked Out checkbox: This checkbox is automatically filled in by the system and cannot be changed. If this asset is currently checked out to an assignee, this checkbox is marked. If the asset is not checked out to an assignee, this checkbox is not marked.
- Check Out Date/Time: This field is automatically filled in by the system and cannot be changed. If this asset is currently checked out to an assignee, the check out date and time are displayed in this field. If this asset is not checked out, this field is blank.
- Due Back Date/Time: This field is automatically filled in by the system and cannot be changed. If this asset is currently checked out to an assignee and if the asset-type item it is associated with contains check out due back settings, this field is automatically filled in by the system. If this asset is currently checked out to an assignee, but the asset-type item it is associated with do not contain check out due back settings, this field will be blank. If this asset is not checked out, this field will be blank.
- Check Out Assignee: This field is automatically filled in by the system and cannot be changed. If this asset is currently checked out, the assignee to whom it is checked out to is found in this field. If this asset is not checked out, this field is blank.
Depreciation Tab
Note: In order to view this tab, the role of the logged-in user must include the Depreciation tab.
The following depreciation information entered in the Depreciation tab may be edited: the in service date, the asset value, the account, the salvage value, and the depreciation through date.
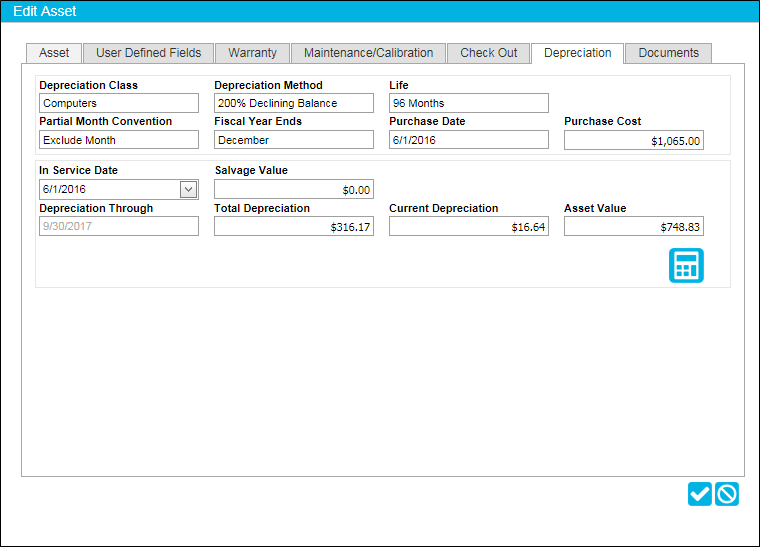
- In Service Date: to change the in service date for the asset, click the drop-down arrow in this field and select the date from the calendar control that appears.
- Asset Value: enter the monetary value for the asset in this field.
- Salvage Value: enter the salvage value for the asset in this field.
Documents Tab
At the Edit Asset form, a file may be uploaded to the asset or removed from the asset.
Note: To reach this tab, the role of the logged-in user must include the Asset Documents feature. To upload, download, or remove a document from an asset, the role of the logged-in user must include edit access to the Asset Documents feature. If the user has read-only access to this feature, the user may download an asset document, but may not upload or remove one from the asset.
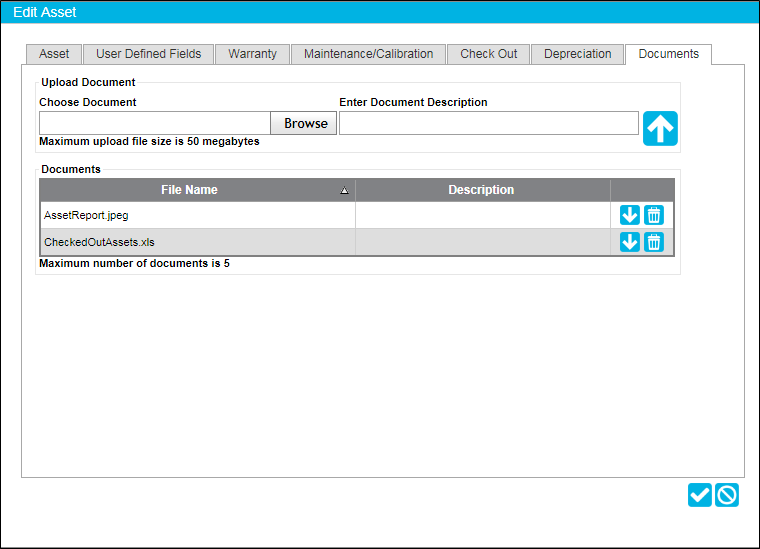
- Upload Document: if the asset has less than five documents, a new document may be uploaded to the asset (see "Uploading a Document to an Asset").
- Delete Document: a file may be deleted from the asset in the File grid (see "Deleting a Document from an Asset").
- Download Document: a file may be downloaded from this tab (see "Downloading an Asset Document").
Saving the Changes
To save the changes to the asset, click the  Save icon.
Discarding the Changes
To discard this information and cancel changing this asset, click the Cancel icon instead.